
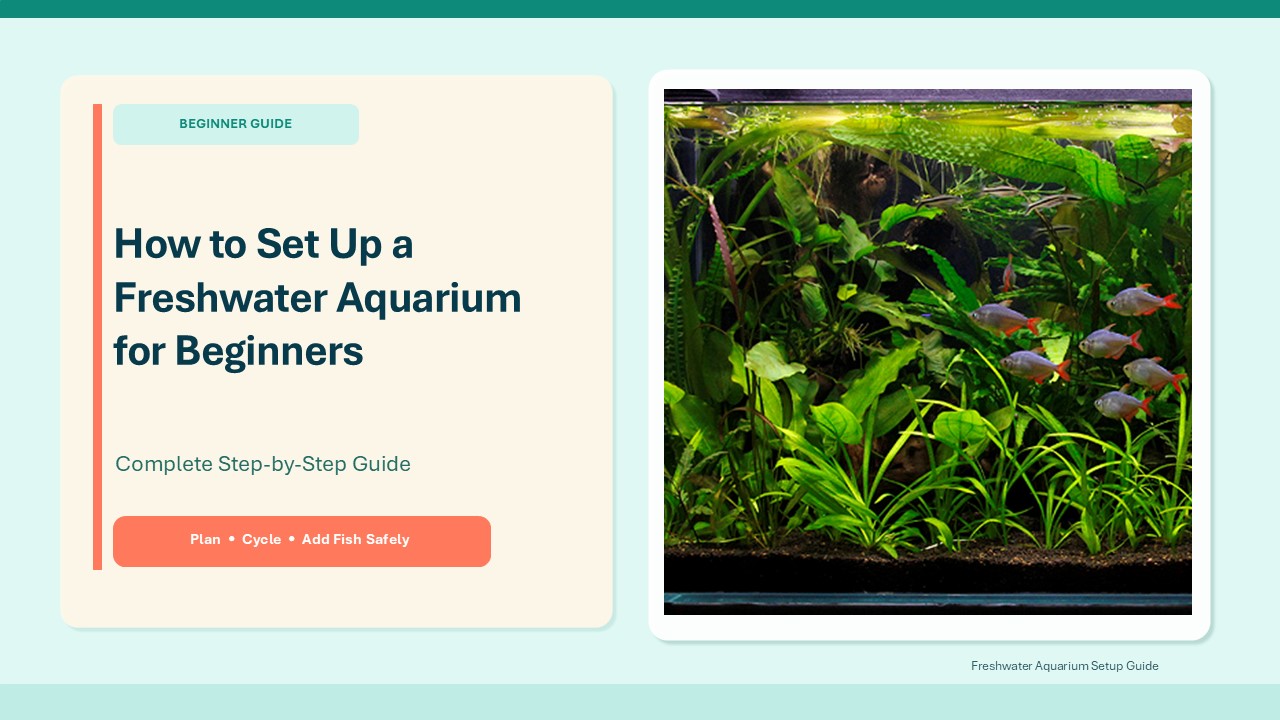
This article teaches beginners how to set up a new aquarium in the correct order. From selecting a tank to getting the right fish, the guide explains how to set up a community tank, species-only aquarium, or a low-tech planted aquarium.
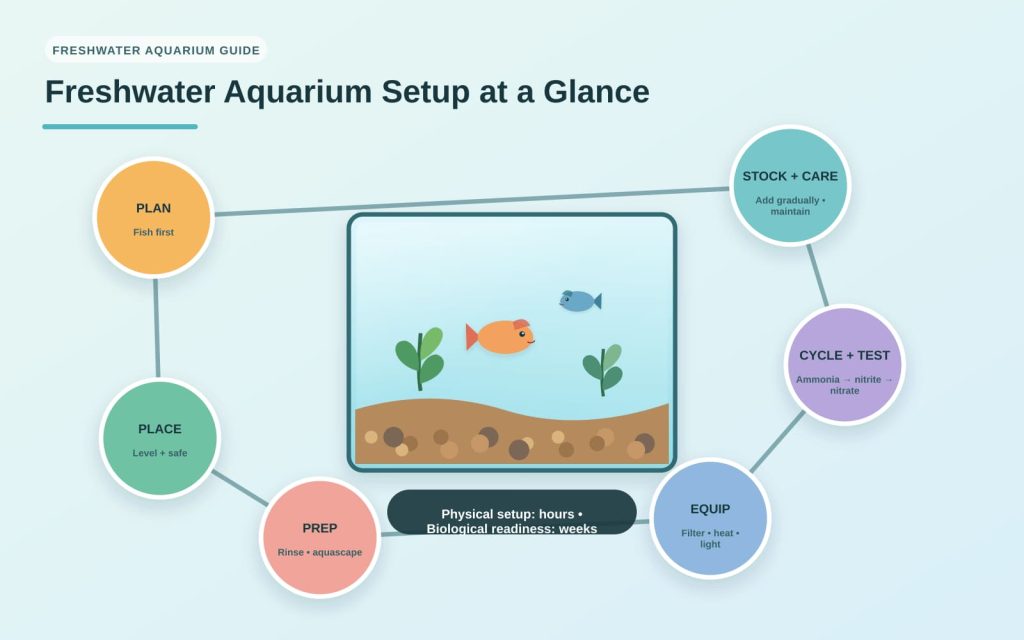
Freshwater Aquarium Setup at a Glance
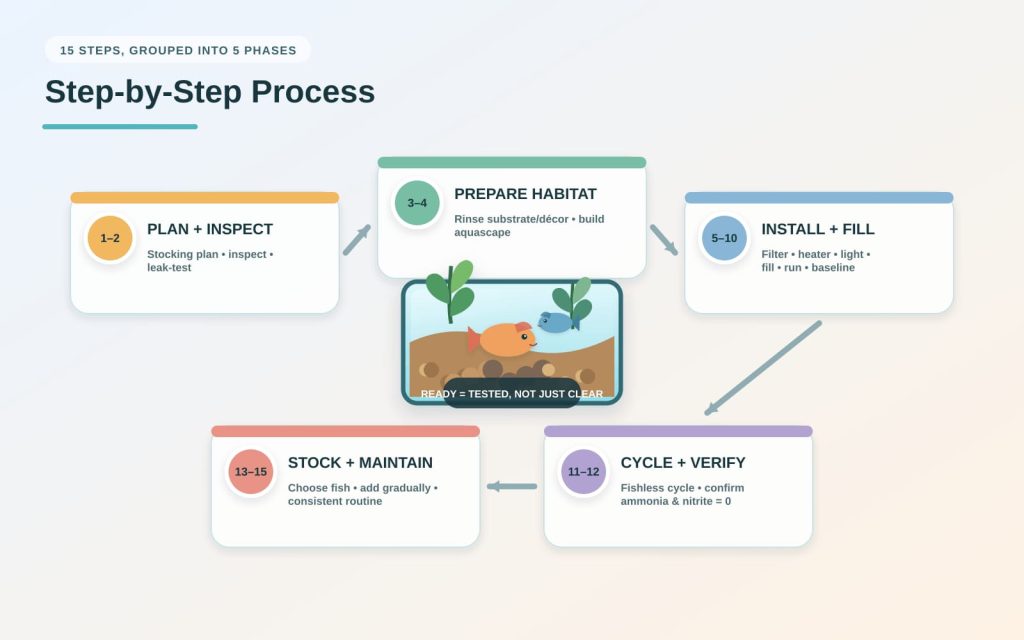
Setting up a freshwater aquarium in a proper manner would typically involve the following steps:
- Consider the types of fish or invertebrates you wish to keep.
- Choose a tank based on their size as well as their behavior.
- Set the aquarium on a suitable stand, which has the capacity to hold its weight.
- Wash the aquarium, substrate, and decor items without any soap or detergent.
- Install the heater, filter, thermometer, lid, light, etc.
- Put in the substrate, decor items, and plants.
- Fill the tank with the treated or conditioned tap water.
- Switch on the filter and heater of the aquarium once everything is in working condition.
- Complete the nitrogen cycle in the aquarium without adding any fish.
- Test the water in the aquarium for ammonia and nitrite.
- Add the first group of fish, which are compatible.
- Continue maintaining the aquarium through water testing, partial water changes, and feeding carefully.
The installation of a physical freshwater aquarium can often be done within only a few hours, while the biological preparation of the aquarium is a much longer process. Cycling normally takes several weeks to complete. Merely filling the aquarium with water and allowing it to sit without any further action is not sufficient because the waste-eating bacteria in the tank need a good source of dissolved oxygen in the filter media and a continuous supply of ammonia.
Planning the Beginner Freshwater Aquarium
The easiest way to begin your aquarium hobby is to do some research on livestock before diving into aquarium shopping. Many fish are sold as small fish even though they will later grow into large fish, require schooling behavior, become aggressive and territorial, destroy plants, eat smaller species of fish, and require water quality that is very different than what tap water is like.
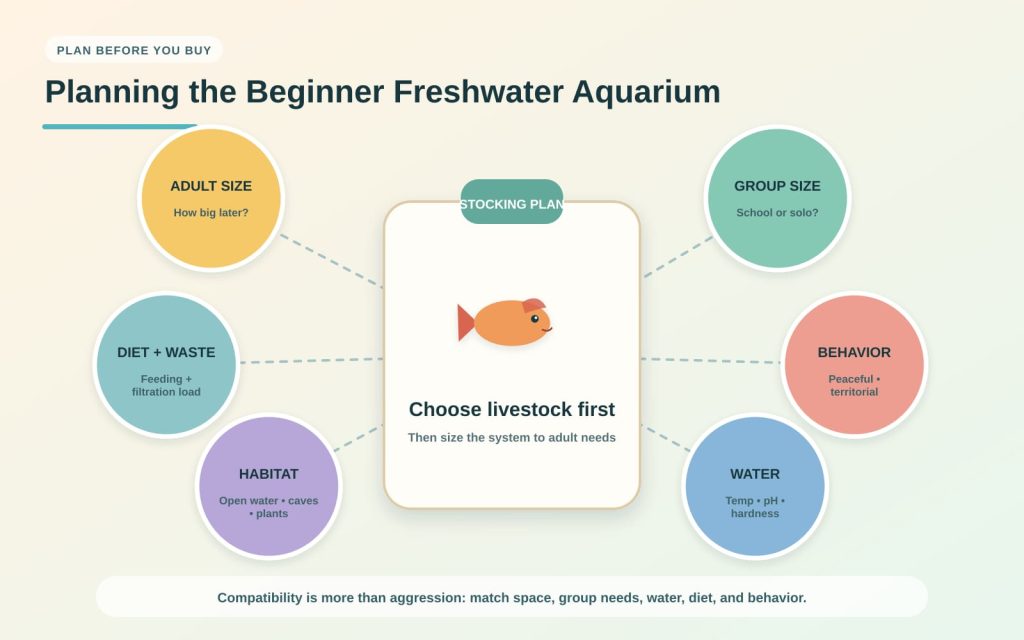
Write out your stocking plan before buying any equipment or a tank. Create a table showing each species’ adult size, temperature preference, school size, aggression levels, diet, swimming levels, and tank parameters. After that, see if all your chosen species would be able to coexist well with each other in the same tank.
A beginner’s fresh-water aquarium is often easier to take care of when it has a clear theme to follow:
- An aquarium containing only peaceful tropical fish
- An aquarium consisting of one type of fish
- An aquarium with less than average fish stock
- An aquarium that doesn’t require tropical fish
Be careful about choosing a fish species just because they are said to be crowned as community species by aquarium stores. Compatibility means different characteristics, such as speed of swimming, shape of fins, food patterns, group sizes, space in the tank, and so on.
Choosing a Practical Tank Size
Small aquariums seem more affordable and easier to maintain, but they can be much less forgiving. In a small amount of water the changes of temperature, ammonia concentration, and other parameters may occur very quickly, thus making it easier for novice aquarists to make (or not make) necessary corrections in large aquariums.
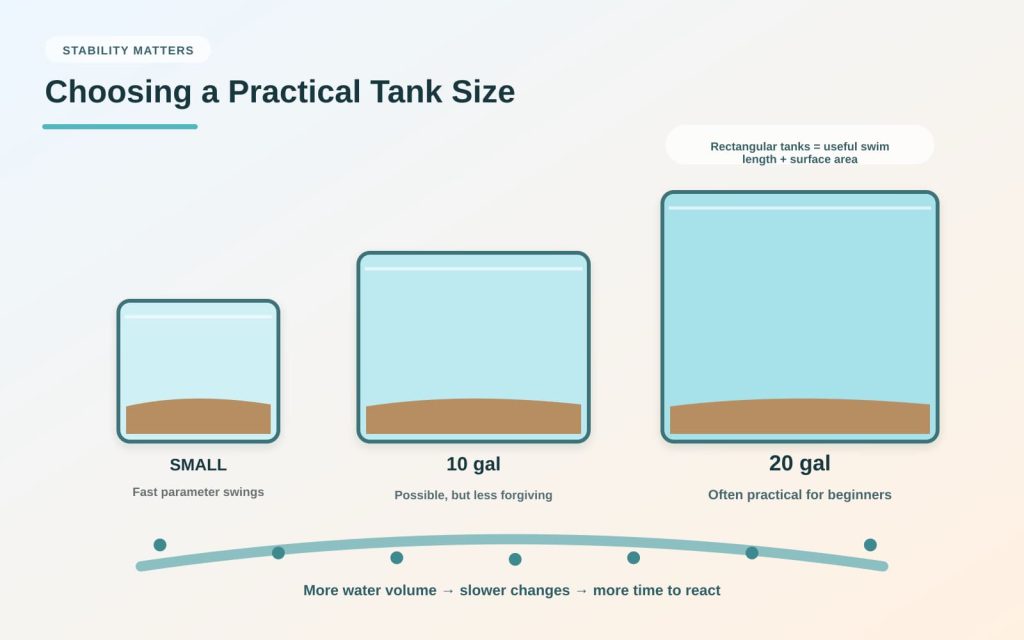
For several small community aquariums set up in tropical environments, it is suitable to begin the aquarium journey with a 20-gallon rectangular aquarium. They can also use a smaller tank of 10 gallons, but this may require more stable maintenance as well as careful stocking. Generally, bigger tanks provide better stability, but they have to be taken care of to deal with the size and weight of the tank.
The tank shape is also important, as a rectangular tank usually provides bigger swimming space for fish and a bigger surface area. Thus, it is necessary to work on the type of tank and select the one that suits the needs of fish in the future.
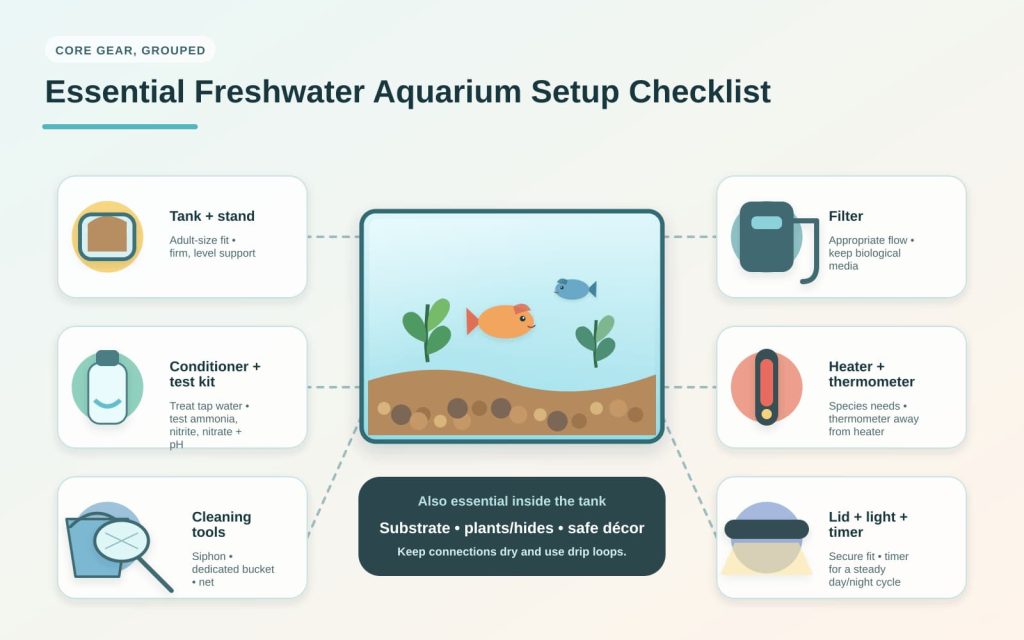
Essential Freshwater Aquarium Setup Checklist
| Item | Purpose | Beginner buying note |
| Aquarium | Keeps the whole aquatic ecosystem in one place | Choose a capacity depending on the adult fish size |
| Aquarium stand | Secures the filled aquarium | Select a firm, flat base and check it for the required capacity |
| Lid or hood | Minimizes leaking and evaporation | Examine the hoses, filters, and power cords for the leaks |
| Filter | Ensures the water movement and filtering processes in the aquarium | Choose the flow and filtration characteristics according to the aquarium parameters |
| Heater | Provides necessary aquarium temperature during tropical water conditions | Opt for an adjustable model according to your aquarium. |
| Thermometer | Shows you the legitimate water temperature | Put it away from the heater for proper use. |
| Light | Provides visual observation and supports plant growth | Use an automatic time switch to establish a regular routine |
| Substrate | Covers the bottom and supports plants or decorations | Select between gravel, sand, or planted substrate as per the desired fish |
| Water conditioner | Removes chlorine or chloramines | Treat every batch of water before putting it into the tank |
| Water test kit | Allows tracking the cycling and the state of the water | Aquarium tests must include ammonia, nitrite, nitrate, and pH |
| Gravel vacuum and bucket | Eliminates waste and old aquarium water | Use a bucket specifically dedicated to aquariums |
| Net | Assists in moving fish, if needed | Choose an appropriate size for the fish |
| Plants and hides | Furnishes hiding places | Avoid sharp or dangerous items |
| Fish food | Provides appropriate food for a given species | Choose a suitable type and size of food for the desired fish |
| Timer and power strip | Ensures organization and safety of cables | Keep connections dry and create drip loops |
Extra equipment with the aquarium may comprise an air pump, air stone, sponge filter, algae scraper, fertilizer, and tools for aquascaping. Air stone may help the surface provide better movement and oxygen exchange, but it cannot be used instead of a proper filtration system.
Selecting the Best Location
Decide on the permanent placement of the aquarium so that it can be filled with water. Once it is filled, even a small aquarium will be very heavy and will not be easily moved.
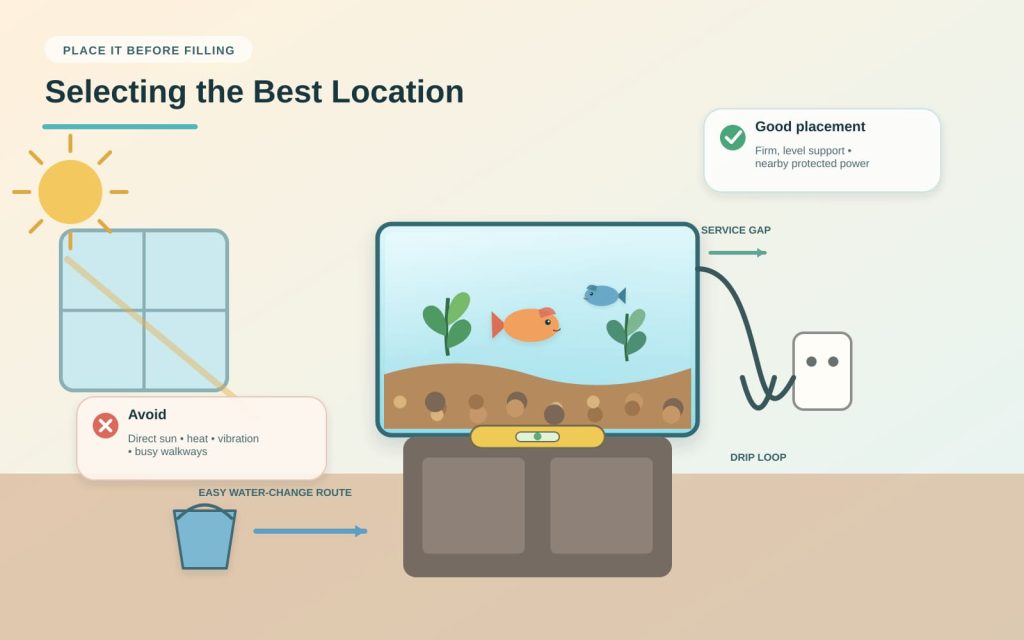
The surface on which the aquarium is going to be placed has to be level, firm, and able to bear the total weight of the complete aquarium. Make sure there is enough space behind the aquarium for servicing the filtration system, cords, and hoses. Make sure the aquarium is near the outlet to connect the pump, but do not forget to cover outlets with protecting gadgets and cords.
Place the aquarium away from direct sun, light heating devices, walls, and areas where its stability may be compromised by vibrations, as well as from places where people walk all the time, which may lead to accidents.
In addition, it’s important to evaluate how you will perform the water changes. Even though a tank may look wonderful in one particular part of your home, the regular chore of lugging heavy buckets across carpets, up stairs, or around furniture every week may begin to get frustrating. The right position makes routine maintenance easier.
Step-by-Step Process
Step 1: Finalize the Stocking Plan
First, make sure to note which types of species will be included in your aquarium and set the aquarium system to fit their adult needs. The following factors should be taken into consideration before buying aquarium supplies or actual fish.
- Average adult size and life expectancy
- Minimum acceptable space for the aquarium and desired dimensions of the aquarium
- Lifestyle conditions of the species to be kept with the fish
- Acceptable range of temperature, pH, and hardness
- Compatibility with plants, snails, shrimp, and other fish types
- Possible waste generation
- Environmental features of the aquarium, such as caves, tops, open spaces, and types of aquatic plants
Don’t make the one-inch-of-fish-per-gallon rule your main method of stocking. This is far too simple. A slim schooling fish may be the same length as a deep-bodied, messy fish, but each has very different demands of filtration and amount of space.
Step 2: Inspect and Leak-Test the Aquarium
Prepare the empty tank on a protected and level surface and check it thoroughly. Never clean an aquarium with soap, detergent, glass cleaner, or products that smell pleasant. Even a small amount of residues may stay in the aquarium, causing harm.
If the aquarium is second-handed or you are not sure of its current condition, make a leak test at a place where you can safely deal with spilled water. Fill it up gradually, check seams, and leave long enough for potential slow leaks to show their effect. After the test, make sure to drain and dry the aquarium before placing it in its permanent place.
Once the aquarium is installed on a stand according to the recommendations by the manufacturer, you should also ensure that the setup aligns with the requirement given by the manufacturer. For instance, in some types of aquariums it is sufficient to place it on its base, supporting the weight through the bottom of the tank, while in other models additional support is needed.
Step 3: Rinse Substrate and Décor
The gravel and sand are purchased, see to it that the rinsing process is completed properly, and check whether the water draining from it is clean enough. However, bear in mind that there are types of substrates that do not need heavy washing and have to be treated according to the recommendations in the instructions.
Only materials that are known to be safe for aquariums should be used. For example, collected rocks can change the water chemistry, and untreated wood brings the risk of carrying a pathogen that can lead to the death of fish. Additionally, decorations containing sharp edges that can harm sensitive structures of some fish are to be avoided at all costs.
The time spent on this step of setting up a freshwater aquarium can help minimize the amount of dust and keep water clear.
Step 4: Add Substrate and Build the Aquascape
In order to make the substrate more attractive, you can either spread it evenly all over or slant it to the sides/a little backward. While the substrate needs to be sufficient for the plants to remain intact, it should not be too thick so as not to induce the accumulation of organic waste at inaccessible places.
It is highly important that large stones and pieces of hardscape must be placed securely in the tank. If you plan to have fishes that burrow, make sure that waterscape elements will remain stable during the substrate movement by the fishes. Do not overload your aquarium with the decorations, and let your fish swim freely.
You should locate taller plants and big landscaping pieces in the rear and sides of the tank. Smaller plants should be placed in the front part of the tank. It would be beneficial to create a sheltered space for shy fishes to hide there, but do not forget to leave enough free space for the cleaning tools.
Step 5: Install the Filter
The filters used in aquariums are classified into three types of filters:
- A mechanical filter helps in the entrapment of material or impurities.
- A biological filter is the habitat of useful bacteria.
- Chemical filters employ certain materials like activated charcoal.
The biological filter is very important in beginner systems. Select a filter that provides appropriate circulation while not generating the flow that can intimidate slow-moving or fish with long fins. All types of filters, like hang-on-back filters, internal filters, sponge filters, or canister filters, can serve the purpose as long as they are properly sized and appropriately maintained.
Install the filters according to the instructions, place appropriate media, and position the intake and outlet of the filter appropriately. Do not plug it into the socket until there is enough water in the aquarium. If your filters are ever changed in the future, ensure that you preserve the original biological media. Resetting entire media at one time may deactivate the majority of the beneficial bacteria.
Step 6: Install the Heater and Thermometer
If the fish species are to be housed in an aquatic environment that requires the temperature to be above that of the ambient temperature, an aquarium heater is a must. The heater used should be selected on the basis of the aquarium size, ambient air temperature, and the manufacturer’s instructions for sizing the heater. Normally, an adjustable heater provides better control than a heater that can be turned on and off depending on the requirement.
The heater should be placed in the aquarium in such a manner that water circulation occurs around it; however, its positioning should be according to the correct orientation and minimum water level requirements. The thermometer should be placed on the opposite side of the aquarium so that the measurement done corresponds to the average temperature in the entire aquarium.
It is advisable to never turn on an aquarium heater if it is exposed to air. It has to be placed in water first and then turned on. When the water is to be changed, the heater should be turned off before the water level goes below the safe level.
Step 7: Add Lighting and a Lid
The lighting of an aquarium ensures that a consistent cycle of day and night is maintained and live plants can grow. Too much lighting could result in algae growth while too little lighting could mean that plants will be weak. Begin with a normal schedule and then adjust it based on how fast the plants are growing and how much algae you have.
Using a timer to turn on and off lighting is much more reliable than switching the light on and off daily. Fish tanks without live plants would require less light intensity. It is also a good idea to ensure that fish get their fair share of sleep at night without disruption.
A lid should be fitted correctly around filters, wires, and electrical equipment. Using a good lid is especially important when dealing with fish, which are known to jump around; it also limits the amount of water evaporation as well as keeps the dust of the house out of the water of your aquarium.
Step 8: Fill the Tank Without Disturbing the Layout
Use a clean plate, shallow dish, or plastic bag to rest on top of the gravel substrate, and then pour the water steadily on the plate. This way, it helps to reduce the pressure of the water and stop it from creating holes and pushing gravel around.
You should partially fill the glass aquarium tank, add or place the plants, and then fill it fully. Make sure to stop when it is filled to the appropriate level for the filter and lid. While filling, make sure to keep looking out for the shifting rocks, floating wood, or any possible leaks.
It is possible to use tap water for filling up freshwater empty fish tanks, but the water must be conditioned in order to remove any disinfectant material left by your water supplier. Make sure to read the label and follow the correct directions on the use of the conditioner, because otherwise, the fish will be harmed, and the beneficial bacteria will get destroyed.
Step 9: Start and Check All Equipment
If the model requires filtering, begin by priming the filter. Once done, turn on the filter, heater, and other powered devices. Check whether water flows into and out of the filter, the heater’s indicator lights properly, and the thermometer starts working properly.
Listen for any strange sounds, and check all connections for any leaks. Make sure that the filter intake does not catch any fish or shrimp; if necessary, a prefilter sponge can be used. The water surface must be sufficiently disturbed, and the current cannot be strong enough to move fish around the aquarium.
Once completed, let the system run for some time, and measure the temperature. The equipment must not have any problems, but a functioning filter and warm water don’t guarantee biological readiness of the aquarium.
Step 10: Condition the Water and Record a Baseline
Make sure you test the pH of both the water source and the aquarium water. You should also consider testing your tap water for general hardness and carbonate hardness from a practical point of view. For most beginners, maintaining water within reasonable limits is much safer than trying to find a perfect pH level using various chemical agents.
Make a record of the date, temperature, pH value, and any hardness tests that may have been done. This comes in handy when you want to select fish species later on.
Never pour untreated tap water directly into the aquarium when it is already inhabited. In the future, treat replacement water before adding it to the aquarium tank and make sure that it is close enough to the tank water in temperature.
Step 11: Complete a Fishless Nitrogen Cycle
Cycling is the process during which the bacteria responsible for processing waste are established. During a fully stocked aquarium, the fish produce ammonia via their waste, leftover food, and dead organic matter. One type of bacteria converts ammonia to nitrites, while other bacteria turn those nitrites into nitrates. Both ammonia and nitrites are lethal and dangerous to the fish. However, it is possible to manage nitrates using the proper plant growth, feeding, stocking, and water change techniques.
A fishless cycle will allow the bacteria process to occur without putting any fish at danger because of ammonia and nitrites. This process is simple:
- Keep the filter and heater running.
- Introduce ammonia specifically intended for cycling aquariums. It can also be accomplished by using a little fish food, as it decomposes.
- Measure ammonia and nitrite levels.
- Continue adding ammonia to maintain the good working of the bacteria.
- Pay attention to the drop of ammonia, the increase of nitrite, and its subsequent decrease, and the accumulation of nitrate.
- Ensure that your filter has adequate capacity to eliminate the added ammonia and bring both ammonia and nitrite to zero in the course of your testing.
- Perform partial water changes in the case that the concentration of nitrate increases too much and add the first fish as soon as possible.
Both mature filter media from the healthy aquarium and bottled nitrifying bacteria can make cycling quicker, but testing is vital. Cycling takes several weeks, and the exact duration of the process can largely depend on temperature, oxygen content, pH, and the type of bacteria used.
Step 12: Confirm the Tank Is Ready
A properly cycled aquarium should comprise:
- Nonexistent ammonia
- Nonexistent nitrite
- Stable temperatures suitable for the selected fish
- Stable pH values with no sudden changes
- Presence of nitrates due to plant growth
- Proof of correct filter working
- Stable water circulation
Don’t judge the aquarium by its looks. Clear water may still contain invisible ammonia and nitrite. Testing is the only means of confirming whether a newly established aquarium is ready.
Whenever there appear to be unusual test results, shout and repeat them comprehensively. Follow all instructions on the kit, analyze the expiration date of the kit, use impeccable test tubes, and compare colors in neutral light.
Step 13: Choose Beginner-Friendly Fish
Being called a hardy fish does not imply that a fish will be able to thrive in an uncycled aquarium. This term merely indicates that maintenance of the species is manageable, its size is convenient, and it behaves well.
If you are a beginner aquarist, you might want to think of certain rasboras, small tetras, danios, platies, corydoras, or a single betta fish in a properly heated and filtered tank. Make sure to keep shoaling fish in a big enough group.
It is better not to buy fish impulsively. Some fish breeds that are easily available in the stores can grow too big, breed rapidly, become aggressive, require special food, etc. Always make sure that the species you are interested in has been used in stores correctly and that its characteristics match your expectations.
Step 14: Add Fish Gradually
Start off with a small amount of fish in your aquarium. Placing all of them in at the same time can result in more ammonia than the biological filter can handle when it first starts.
Before placing fish in the aquarium, decrease the lights and temperature to match the transport bags. To acclimate fish, use a safe procedure. If the store water and tank water are vastly different from each other, take necessary steps to help fish acclimate. Ideally, you will use a clean net instead of dumping the store water into the tank.
In the first few days after introducing the fish, monitor their normal behavior. They must breathe properly, keep their balance, swim and feed, act normally in social situations, etc.
A separate quarantine aquarium is useful for an already established aquarium, as we are able to monitor the new fish and avoid problems with fish diseases. The quarantine tank must be equipped with proper filtration, heating, and other devices and also requires appropriate attention.
Step 15: Build a Consistent Maintenance Routine
Aquariums that possess stability require proper maintenance, meaning cleaning and disinfection should not be a part of the process. Instead, perform a weekly schedule of maintenance based on the action plan and include:
- Fish observation prior to feeding.
- Checking if the equipment works properly and the thermometer has proper readings.
- Tests should be run on water, especially if this is a new aquarium.
- Partial water changes by vacuuming old water.
- Filling up the tank.
- Cleaning inside glass as needed.
- Trimming off all damaged or unhealthy plants and leaves.
- Verifying filter flow.
Water change percentage will depend upon how many fish exist in the tank, how much food they consume, how plants grow, and what the test results show. It is better to periodically change small amounts of water rather than wait for months and do it all at once.
Filter sponges and other mechanical tools should be cleaned only when the flow is limited or clogged. It is necessary to wash them in the aquarium’s removed water only or in treated water. Do not wash biological material in untreated water and do not swap out all media at once.
Water Parameters for a New Freshwater Tank
| Parameter | Beginner target | Meaning |
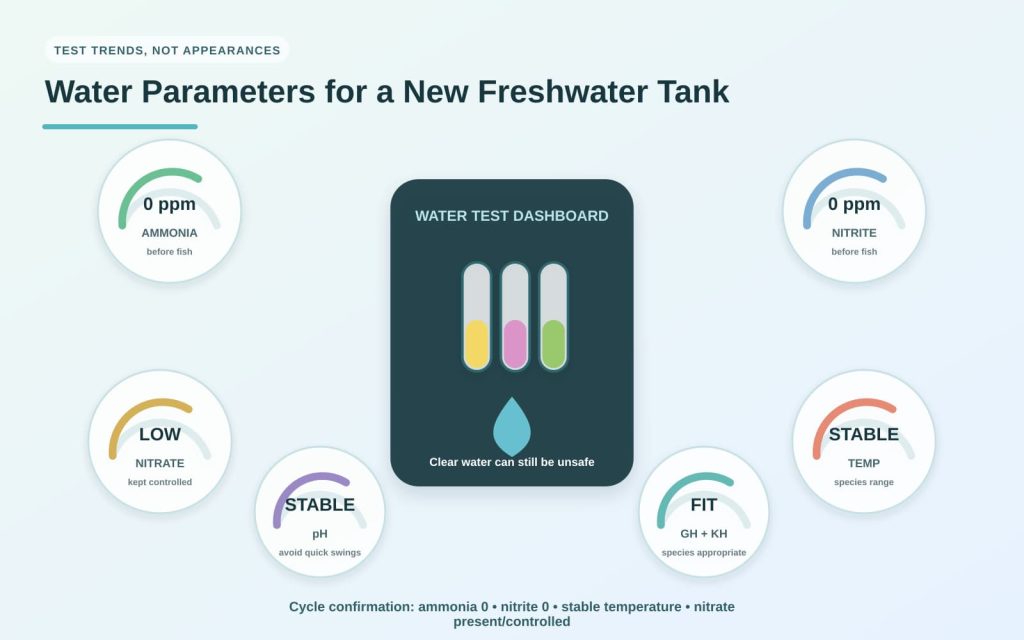
| Ammonia | 0 ppm before introduction of fish and during standard functioning | Shows presence of unreacted waste or cycling problem when found |
| Nitrite | 0 ppm before the introduction of the fish and during standard functioning | Might suggest that the biological filter is either not completely developed or overloaded |
| Nitrate | Low and kept in check for the fish to survive | Controlled through plants, feeding, stocking, and water changes |
| Temperature | Consistent with the preferred range of a species | Intrude on fish due to sudden temperature shift |
| pH | Stable and correct for the fish | Stability of pH is usually a safer option than altering it chemically repeatedly |
| GH and KH | Proper for species to be selected | Affect mineral levels and stability of pH |
There is no one best number for all kinds of freshwater fish tanks. Different fish and tank setups may all need their own unique set of water parameters.
Common Beginner Mistakes
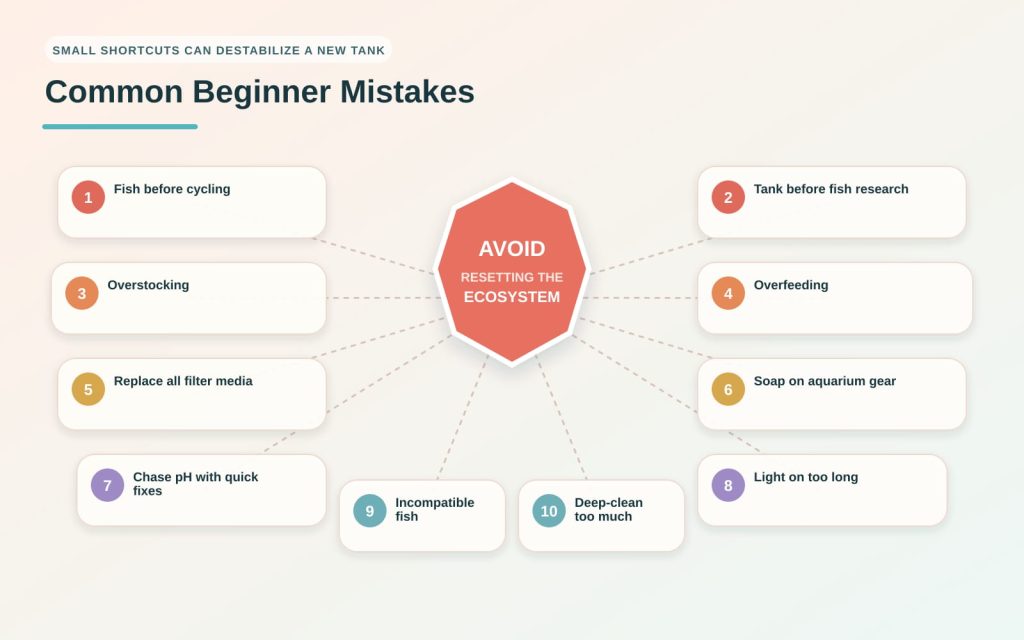
Adding Fish Before Cycling
This is one of the bigger mistakes beginners make while setting up an aquarium. Clear water and proper filtration don’t mean that the filter will be able to process waste from fish safely.
Buying the Tank Before Researching Fish
An aquarium is very likely to be too small, too high, too hot, too cold, or insufficiently filtered for a certain species.
Overstocking the Aquarium
Too many fish can lead to waste, stress, competition, and too much care. Always remember to stock an aquarium according to adult size and behavior rather than the young size seen in fish tanks.
Overfeeding
Food that fish do not eat decays and makes waste in the aquarium. Feed fish only as much food as they can eat right away, and adjust the feeding schedule based on the condition of your fish.
Replacing All Filter Media
A considerable amount of beneficial bacteria exists in filter media. Changing it significantly may cause disruptions in the nitrogen cycle. Clean and change only what is necessary.
Washing Equipment With Soap
Many common cleaning products leave behind residues harmful for the aquarium. Use only plain water when cleaning and have separate tools used for aquarium maintenance.
Chasing pH With Quick-Fix Chemicals
Too frequent changes of pH results may cause dramatic alterations. It is generally advisable to choose fish that match the water available to you or gradually change it well.
Leaving the Light On Too Long
Proper aquariums shouldn’t get excessive light. Using a timer to regulate light based on the plant type and aquarium activity helps greatly.
Adding Incompatible Fish
Compatibility refers to a long list of issues, besides aggression. Temperature, diet, habitat, chemistry of water, quantity, and feeding habits should be compatible.
Cleaning Too Aggressively
A healthy aquarium doesn’t have to be clean of all traces of dirt. Deep cleaning of the substrate, getting rid of the old filtering system, and water changes may be harmful.
Troubleshooting a New Freshwater Aquarium
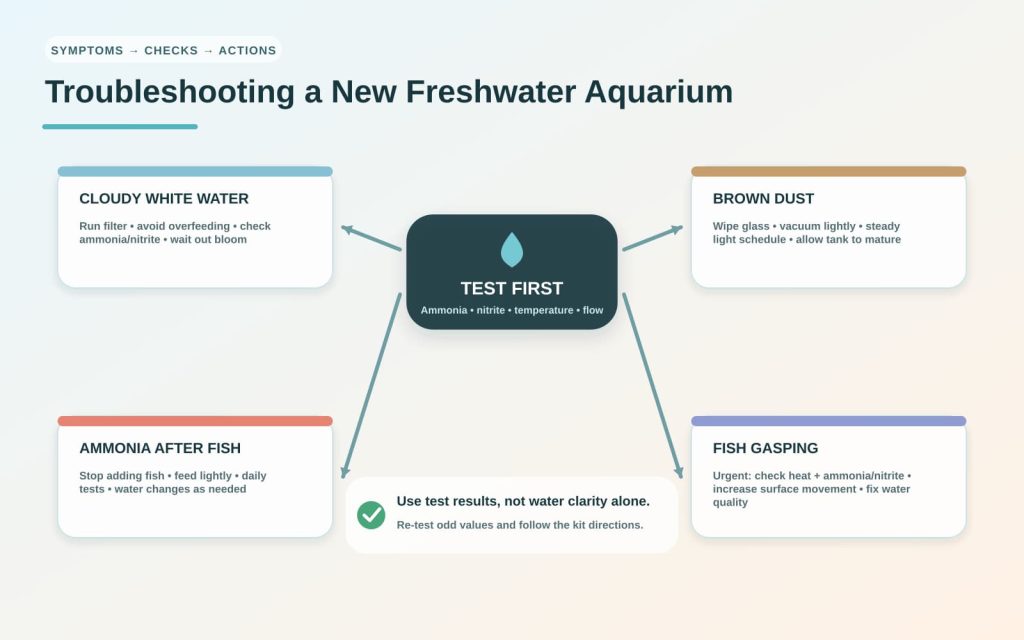
Cloudy White Water
Usually, a new aquarium shows signs of a short-term bacterial bloom that can be eliminated by checking the water for levels of ammonia and nitrite, avoiding overfeeding, running the filter, and not adding fish. It is crucial to pay attention to water tests rather than only relying on visual inspection of the aquarium.
Brown Dust on Surfaces
It is not uncommon to find brown diatoms in a new aquarium. It is possible to clean the glass, perform vacuuming, adhere to a proper lighting schedule, and wait for the aquarium to mature.
Ammonia After Fish Are Added
Stop adding fish, keep the feeding at a minimum, carry out daily water tests, and conduct small water changes in case there is a need to do so. Make sure you check for any dead plants or animals and low water flow rate, and also check if the biological filter media is already damaged.
Fish Gasping at the Surface
Make sure to treat surface bubbling as an emergency alert. Check the water temperature, levels of ammonia and nitrites, filter quality, and surface movement. Do your best to give the aquarium the best aeration rate and fix the problem of water quality.
Natural Live Plants in a Beginner Setup
Aquatic plants will provide coverage, absorb nutrients, and make the aquarium look more established. Some popular beginner plants include Java fern, anubias, Java moss, crypts, and floating plants, but each plant will have its own lighting and nutrient needs.
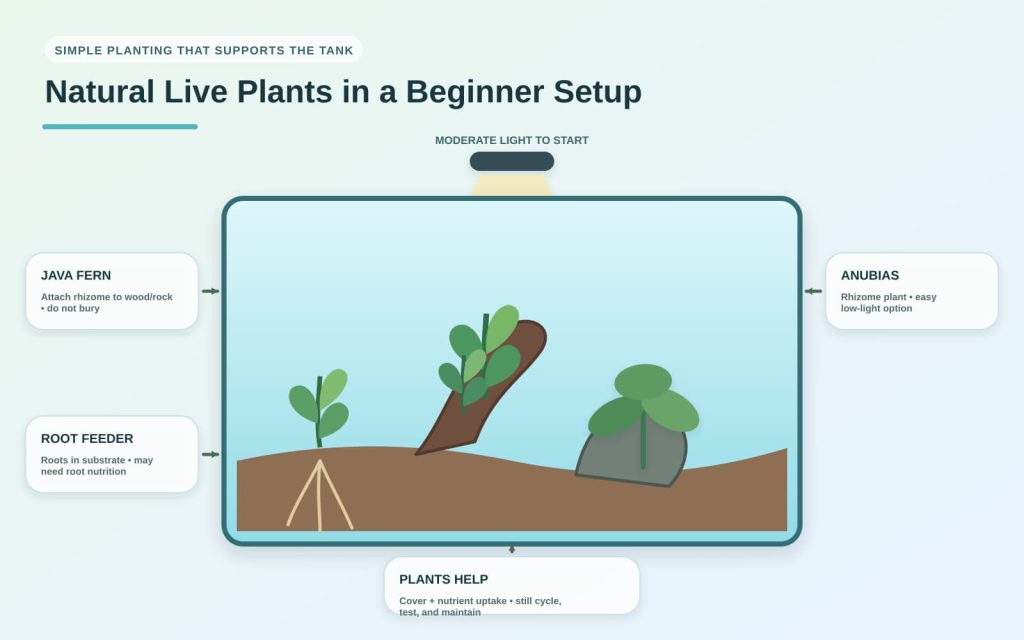
In terms of the rhizome plants like Java fern and anubias, they are typically attached to wood or rocks rather than buried deep in the substrate. Plants that feed on roots will often need either root tabs or nutrient-dense substrates to thrive. It is best to start with moderate lighting because high light levels without sufficient plant growth and nutrient levels present may lead to algae blooms.
Even with all the plants supporting your aquarium, you still must follow a protocol for how to set up and maintain a freshwater aquarium with live plants that includes areas such as water conditioning, filtration, testing, cycling, and gradual stocking.
Quick answers
Frequently asked questions
How long does it take to set a freshwater aquarium?
The setup of the physical equipment and decor usually takes a few hours, while the nitrogen cycle can take several weeks. The tank will be ready when tests indicate that the filter is capable of processing all ammonia.
Can fish be put into the freshwater aquarium immediately?
The fact that the aquarium is newly filled does not make it safe to put fish into it because the water is clear and the filter is running. Make sure to finish the nitrogen cycle before putting any fish into the tank.
What is the best size of a tank for a new freshwater aquarist?
A rectangular twenty-gallon tank is often a very good option for a beginner, as it provides better stability and allows some flexibility when it comes to stocking.
What tools do you need to get started with a freshwater fish tank?
To start your tank, you have to get an aquarium tank, appropriate stands as well as a cover, filtration equipment as well as a heater according to your needs, thermometer as well as lights, substrate, water conditioner, testing equipment, siphon, bucket, net, and water-safe plants and decorations.
How often is the fresh water to be exchanged in your fish aquarium?
The answer is based on fish stocking, fish feeding, the extent of plant growth in the tank, and the results of water tests. Most successful aquarium tanks undergo partial water changes every week or once every two weeks, while fish tanks with a lot of fish require more frequent changes.
Can I use city water for the freshwater fish tank?
The city tap water can be used if it has been treated with the conditioner to neutralize any chlorine or chloramine present. The pH and hardness of the source water need to be determined as well to get the right fish for your tank setup.
Is it important to have a heater in a freshwater aquarium?
When fish prefer to live in warmer water than ambient temperature provides, a heater becomes a must. However, some species that tolerate cooler water may not need heating. Nevertheless, temperature stability is of utmost importance.
Does a freshwater aquarium need an air pump?
Not always. If the right type of filter is used, one that allows for ample surface movement, efficient gas exchange will take place in the aquarium without the need for any additional equipment. However, an air pump can help to power a sponge filter or significantly improve aeration in tanks where water movement is not sufficient.
What is the best method for starting a freshwater fish tank?
The best way is to first decide on the type of fish to be kept, set up all necessary equipment, fill the tank with treated water, conduct a fishless cycle, check for ammonia and nitrite levels, and only then introduce fish in a gradual manner.
Is there a difference between setting up a freshwater aquarium and cycling?
Setting up refers to assembling the aquarium itself, including the substrate, decoration, and equipment, while cycling is the part where the bacteria that is going to convert ammonia and nitrite is developed.
What is the proper way to clean the filter media?
Clean the reused media in the aquarium water being drained out or in the conditioned water without using any tap water and replace the entire media.

About the author
Chloe Adams
I'm Chloe Adams, a beginner aquarium expert and writer for Stardexa with more than 11 years of experience in the field of fishkeeping. As many beginners find aquariums hard to comprehend, I've kept learning, practicing, and sharing all the basic information from choosing the right aquarium to cycling it, filtering it, feeding the fish, and taking care of water quality as well as maintaining it regularly. My aim is to ensure each novice fishkeeper knows how to turn his/her aquarium into a pleasant and healthy habitat for fish.
Reader Fishkeeping Feedback
Comments, questions, and aquarium reviews
Share your aquarium experience, ask a fish care question, or write a helpful note about tank setup, water quality, filters, algae control, or maintenance for other readers.
No aquarium reviews yet. Be the first to share a helpful review on content or fishkeeping question, setup tip, or care experience.